Machine learning is getting more and more popular. Demand for ML development is increasing, and so is the complexity of such systems. Up until now, .NET programmers who wanted to create self-learning solutions had to do one of three things:
- Learn R
- Learn Python
- Use external machine learning providers, such as Microsoft’s Azure.
As learning an entirely different programming language is difficult and takes a lot of time, the third option seems to be the easiest. There is no need to learn a specific language as every product chosen from the cloud provider’s repertoire becomes a web service ready to be consumed.
However, such tech is no longer viable when there’s one of these among client’s requirements:
- Operating Expenditure of an API can’t be too big of a cost
- Final solution is supposed to work offline.
If one of these is true, then the cloud provided machine learning is not applicable.
For those who wanted to stay within Microsoft’s ecosystem, there was no other product providing easy to use tool allowing to use self-learning algorithms. Until now.
What is ML.NET?
ML.NET is a free, open-source and cross-platform machine learning framework, created by Microsoft for the .NET developer platform. It works both offline and online. It allows developers to use pre-trained TensorFlow and ONNX models.
Currently, supported scenarios include:
- Classification -matching input to one of the categories
- Regression -predicting continuous values
- Anomaly Detection -filtering out unusual signals in a stream of data
- Recommendations -matching users with products they might like
- Time series -predicting movement in sequential data
- Image classification -assigning labels to vector images.
The main components of ML.NET are:
- AutoML -a tool that abstracts away the process of choosing a machine learning algorithm
- Model Builder -Visual Studio Extension presented in this article
- ONNX Runtime -runtime allowing usage of models made in ml.net and converted from other libraries.
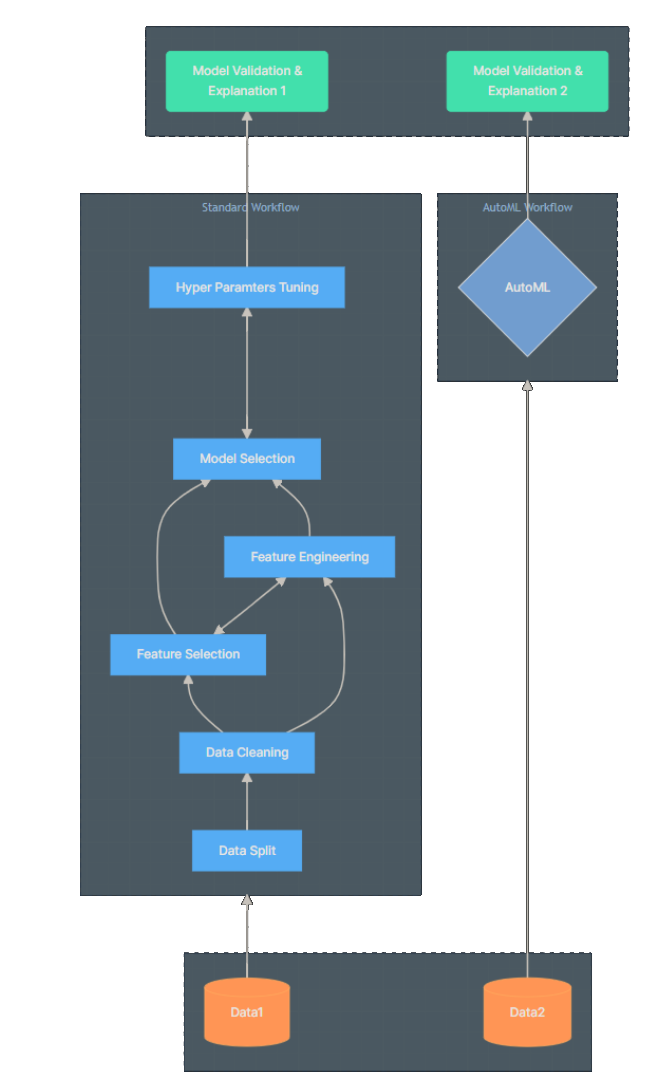
AutoML automatically analyses many machine learning algorithms, determines which one is best and creates a Visual Studio Project with C# code. The generated project contains code that allows users to train and consume machine learning models. It replaces a lot of work previously done by ML Specialists, like model selection, data cleaning, feature engineering and selection:
The possible templates for these projects are:
- Console Application
- Web Application
- Notebooks (Notebooks are documents with pieces of code editable straight from UI)
- To use ML.NET, the only thing you need is Visual Studio license (I highly recommend 2022 version).
How to install ML.NET?
- Open the Visual Studio Installer
- Select Modify for your current version of Visual Studio
- From the tabs at the top, select the Individual components tab
- From the list of components, check the ML.NET Model Builder checkbox
- (optional) You can also install Notebook Editor for it.
Here is how it looks like in my Polish interface:
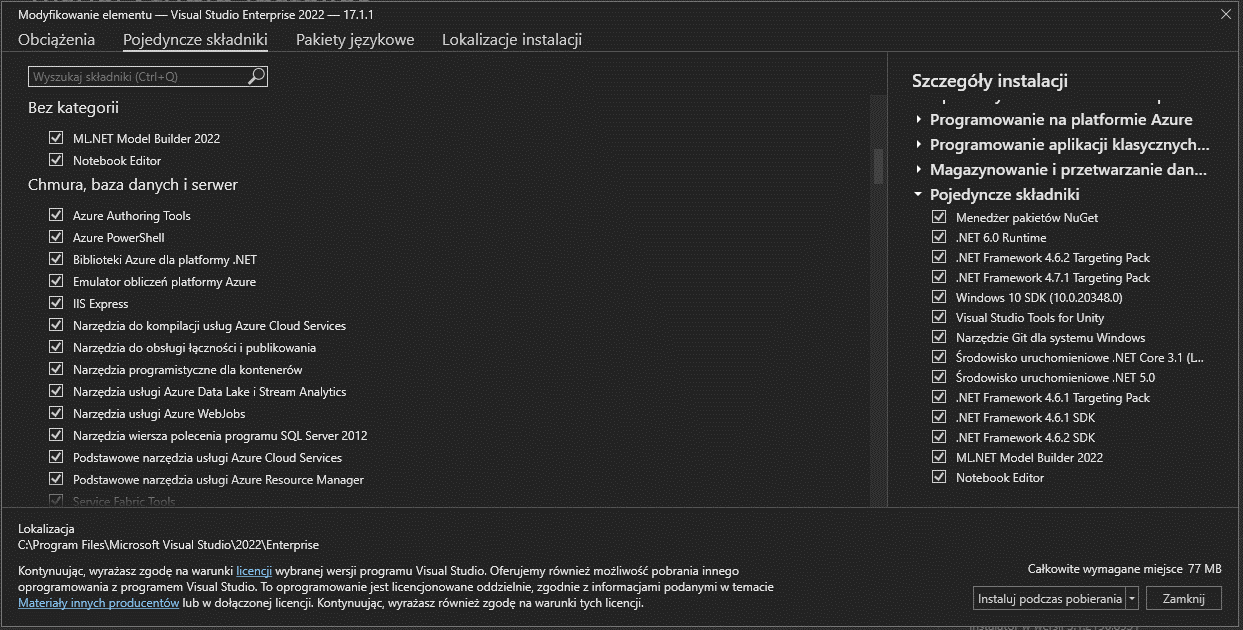
Yes, I prefer using dark mode.
The extension automatically updates you when there’s a new version.
How to use ML.NET?
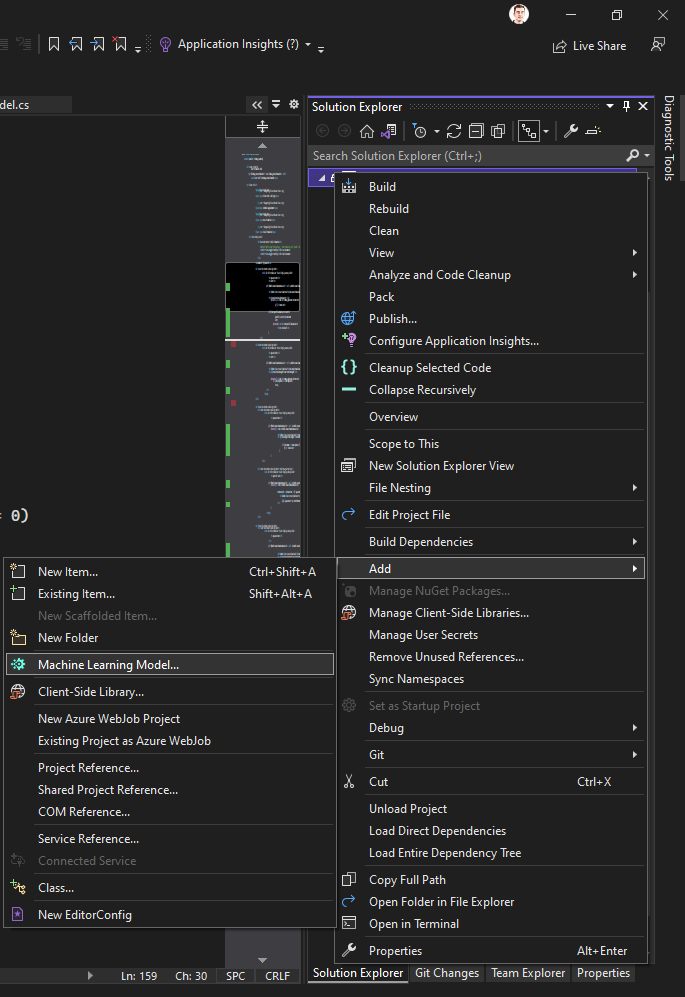
Either create a new project or use the existing one. Then, right click on the project name in the solution explorer and choose from those options “Add – Machine Learning Model…”.
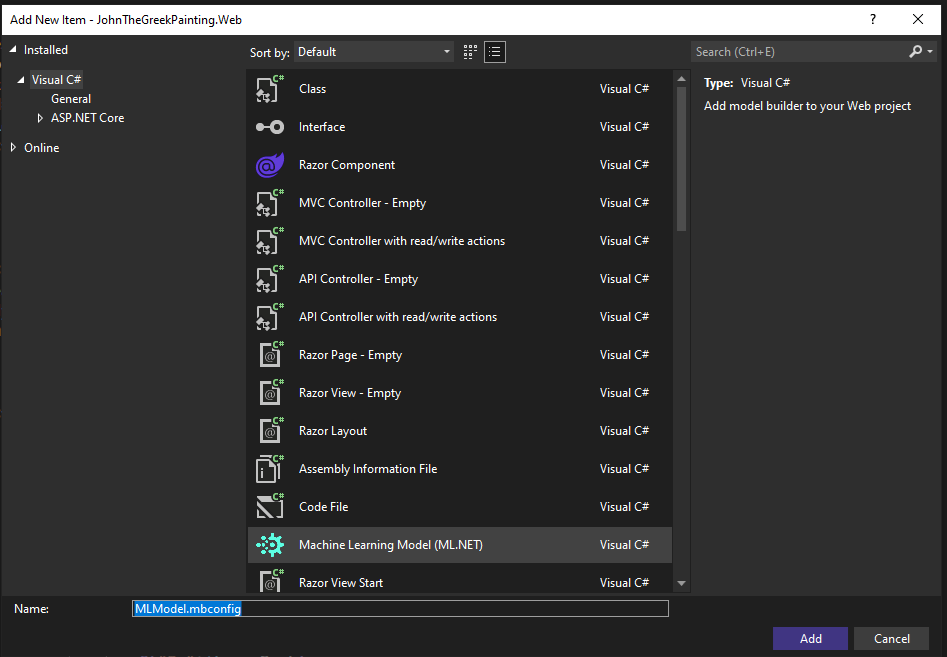
In “Add New Item” popup choose name for your model file.
From here we can pick a scenario. On this screen we see which scenarios are supported and how to train them. For example, “Value prediction” can be trained locally only, “Image classification” can be trained both in Azure and on local machine (which generated model to be used offline), and “Object detection” scenario can be only trained on Azure’s GPU virtual machine (which, again, gives us model to be used offline). The items in “Limited scenarios” don’t do much currently, only pointing to some examples online.
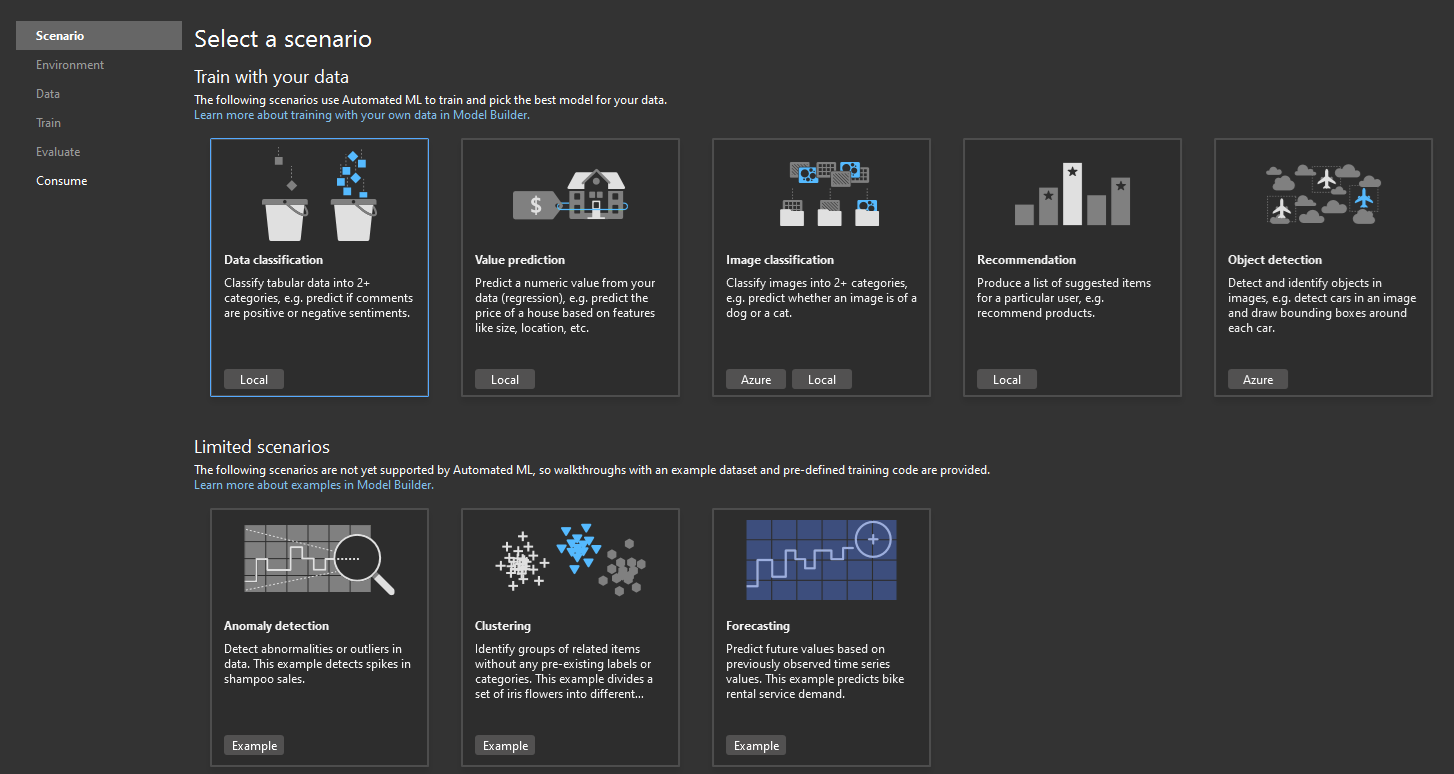
For the sake of this article, I chose the first one, Data Classification. It is the most often used example of data prediction. Usually, it is paired with Iris flower dataset. Microsoft’s official documentation on this tech covers:
- Sentiment Analysis (It uses website comments to classify them as either positive or negative)
- Multiclass Classification (it categorises support issues scraped from GitHub to assign proper labels to it).
In this tutorial, I chose something slightly different: Palmer Penguins. It’s a dataset of Palmer Archipelago (Antarctica) penguin data. It contains measurements of the upper right of a birds’ bill, flipper length, sex and body mass. There is also a column that specifies to which species the specific penguin belongs. You can download the dataset from here.
It also contains a project that I made so that you can compare the results.
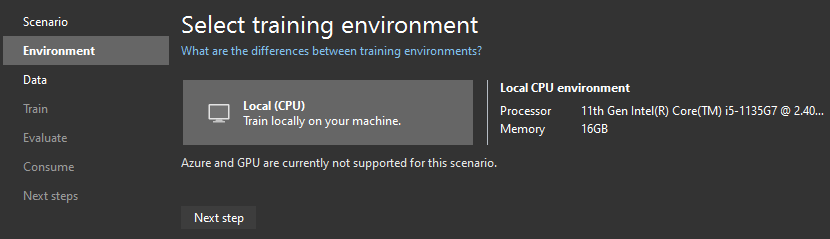
After choosing scenarios, Model Builder asks us about Environment. Local (CPU) is the only one available to me, so I click Next step:
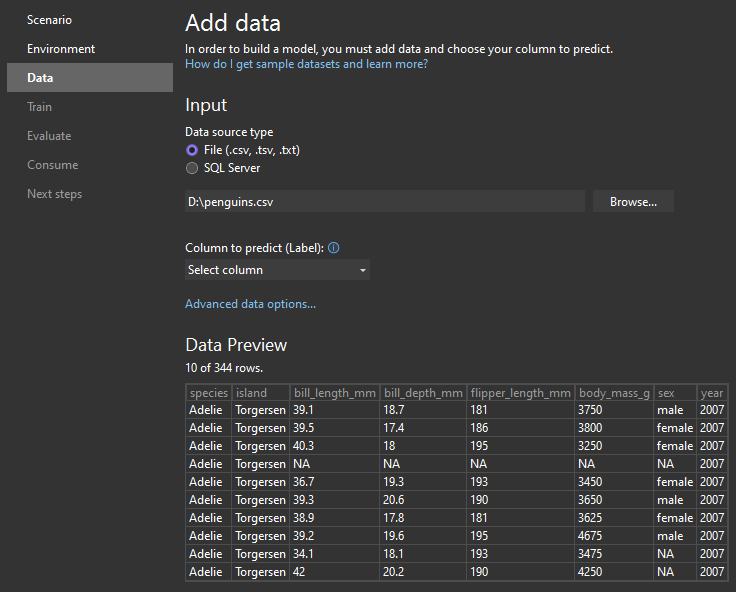
Loading Data
In the Data tab, we choose the source of the data. As you can see, we have an option to use SQL Server, which includes:
- Microsoft SQL Server
- Microsoft SQL Server Database File.
In my example, we use csv that I mentioned before. Click “Browse…” and point the program to the download location of penguins.csv. After doing so, “Column to predict (Label)” is no longer grayed out. From the dropdown, choose the “species” option. Under “Data Preview” section, you can see if the data loaded correctly. Just to make sure that Model builder correctly recognized which columns it sees as number and which ones as strings we can check “Advanced data options…”
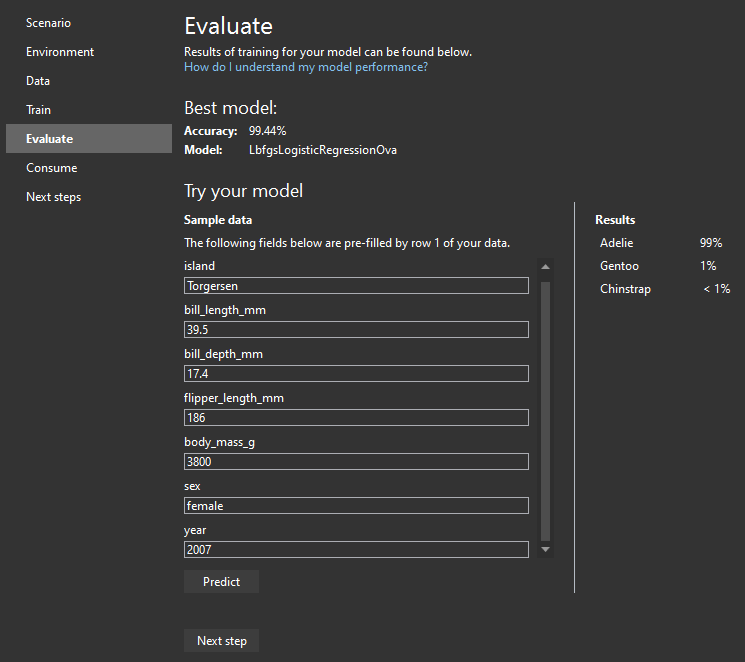
At the “Train” step, we choose how long the training should take (in seconds). Trust me, the longer the better. After training, we should see a nice little summary:

At Evaluate step we can input our own values to check if our model makes good predictions. In our case, we can play around with body mass, bill parameters and flipper length to see which species will most likely match those values. At the screenshot you can see an example of Adelie:
At the “Consume” step, we have an option to generate Projects from specific templates. As you can see on the screenshot, I can generate Notebooks because I installed an extension for it in my previous steps:
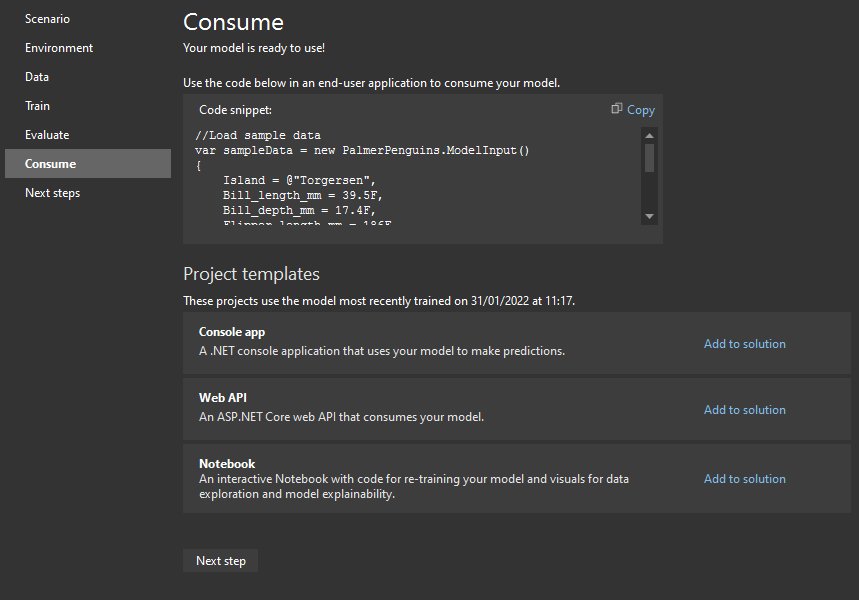
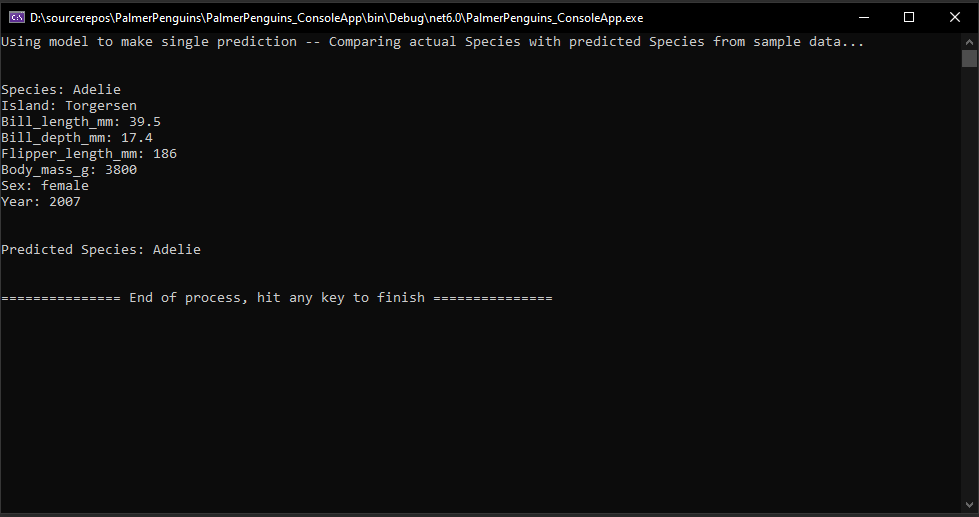
For now, create at least a Console app and run it. You will see that code makes prediction based on hard coded values.
Summary
Even though we went through only one scenario in ML.NET’s repertoire, the possibilities are endless. Building custom models and integrating them into existing apps is as easy as it gets with Model Builder’s 6 step workflow. If you dig deep enough, even the scenarios not covered by this creator will be achievable to use if you use the code-first approach based on code generation, Microsoft’s documentation, samples and tutorials.
The only thing you should consider is if the effort is worth it in the end: Azure Machine Learning is really advanced with a similar, if not easier workflow. Before starting your work, check which option fits you better.