
Welcome to the second article in the Dapr series. The first one, which was a theoretical introduction, can be found here. If you missed it, feel free to check it out.
In this one, we are going to have a little bit of everything. First, we will talk about the sidecar mechanism. After that, we will run an installation process. Finally, we will see how Dapr runs and make our first request. Quite a lot on our place so let’s start.
Sidecar mechanism
I firmly believe in understanding the tools that I use. Therefore, I want to start by understanding how Dapr works. This is done through by using the sidecar mechanism. This is because Dapr is not a library that is loaded into your microservice. The Dapr runs alongside your microservice. It's a figure of speech. This mechanism of running alongside the microservice is called a sidecar. Each microservice within the Dapr mechanism has its own sidecar. When we make any kind of Dapr request, we are sending request to the sidecar.
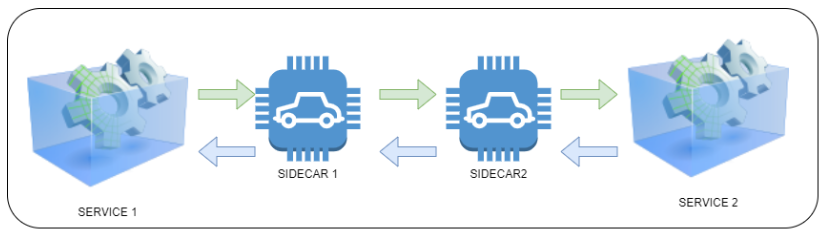
This is an illustration of a very simple situation. We want service 1 to send a request to service 2 and to receive a response from it. In the raw case, the image would have two services and two arrows. One represents the request (the green one) and the other represents the response (the blue one). However, simpler doesn’t mean better. The image above has Dapr elements included. By including Dapr, each microservice gets decorated with a sidecar. This sidecar controls, or at least it should be, all operations involving the matching microservice.
It is thanks to this approach that we can add new Dapr capabilities without integrating them in microservice code. Plus, it makes Dapr technology agnostic. We can introduce this Dapr infrastructure into a microservice created in any technology.
This approach also makes it easy to introduce new functionalities such as encrypting traffic, tracing/monitoring, auto retries and access policies.
Dapr Modes
When it comes to running Dapr, there are two ways (modes) that we can use. I’m not going to tell you that one is superior to other, as it mostly depends on the situation and the business needs.
Self-Hosted. This is the “easier” mode. In it you install Dapr and run sidecars on the machine where microservices are running. In this mode, we are responsible for running Dapr ourselves This is a preferable scenario for local development, but it is also perfectly valid for production.
Kubernetes Cluster. This is the more “complex” mode. This is mostly because not everyone is comfortable with Kubernetes. If you go with this approach, Dapr would be installed in the cluster and the Kubernetes pods would be containing both microservice and side car.
We will opt for the first approach - the self-hosted variant.
Installing The Dapr CLI
The Dapr CLI is the main tool you’ll be using for various Dapr related tasks. You can use it to run an application with a Dapr sidecar, as well as review sidecar logs, list running services, and run the Dapr dashboard. The CLI works well with both modes.
We need to install it first, no matter what mode are we going to choose. The installation instructions can be found at https://docs.dapr.io/getting-started/install-dapr-cli/.
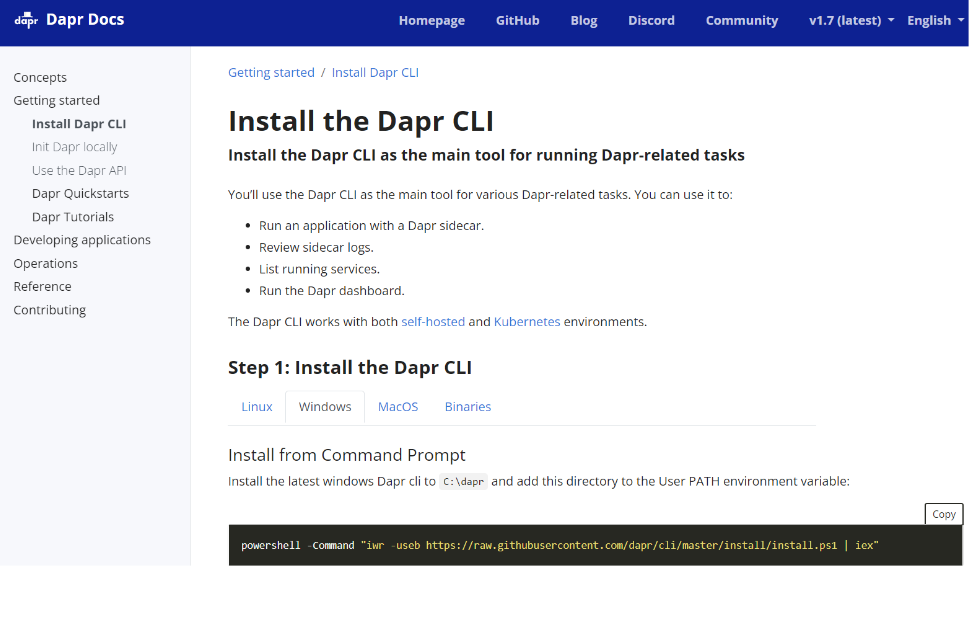
Although I will select the Windows installation, you can choose any operation system you need. At the moment of writing this post the installation command looks like this:
powershell -Command "iwr -useb https://raw.githubusercontent.com/dapr/cli/master/install/install.ps1 | iex"
Please keep in mind that this is a living project. So always copy the latest command from the documentation page. Now all we need to do is run this command as administrator.

Chances are that you will come across this message.

If so, simply run a given command to change the execution policy.
After another run, of the first command, the result should be ok.
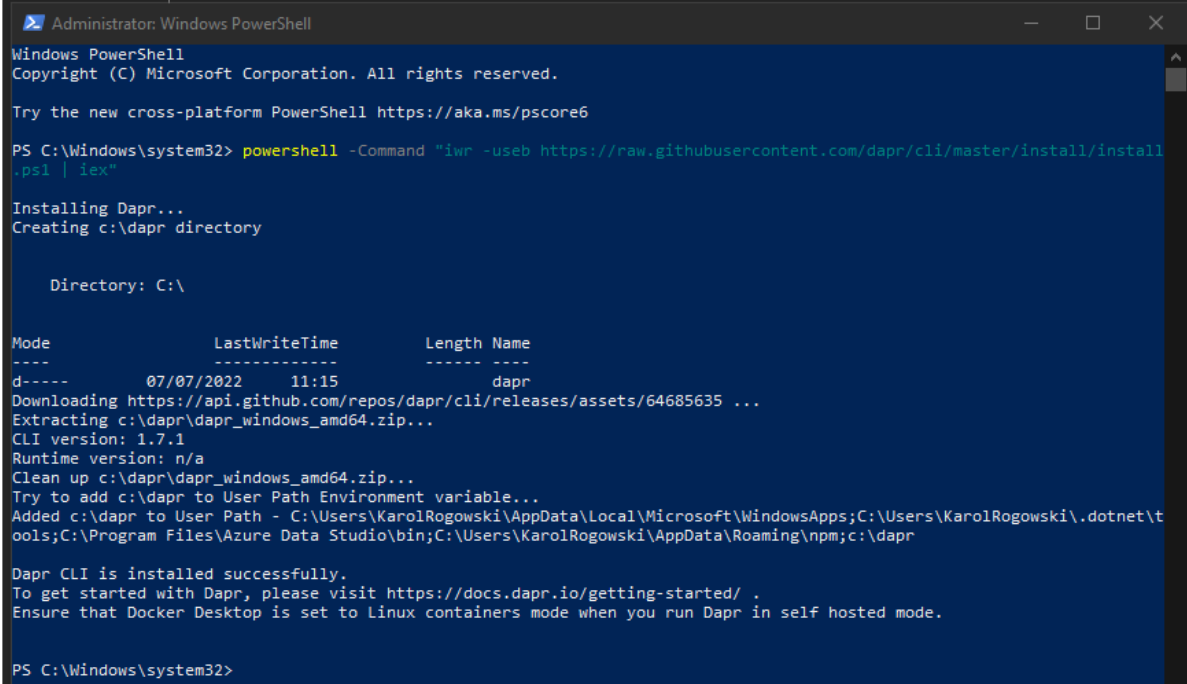
Now we can check what we have installed. To do this, simply run a command dapr -v in the command line.

Here we can see that we have installed the CLI in 1.7.1 version and there is no runtime. This is absolutely correct, because we have not installed one yet - we will do in in a second.
Installing Dapr Runtime
As mentioned earlier, we will be using the self-hosted mode. All the latest installation information can be found at https://docs.dapr.io/getting-started/install-dapr-selfhost/.
When we enter this website, we will be informed that Docker is required for Dapr to work.

Installation of Docker is a separate topic, so I will assume all of you have it deployed or know how to do it. It is easy, so no need to worry.
Installing the latest Dapr runtime is super easy. All we need to do is run the dapr init. command
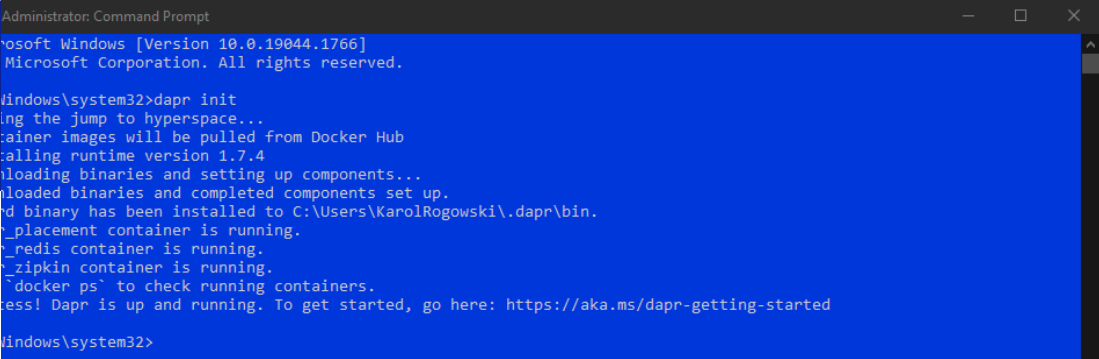
After a short (in my case 9 minutes) jump into hyperspace, the installation is complete. We can check if all is running correctly by typing the commands. First ,dapr –version and second, docker ps. The first will one show us the version and the second one will give us the list on containers. In that list we should be able to find Dapr elements, a we can see belove. All the elements look just fine.

It is alive 😊
Finally, all the pieces are in place, so we can see if it works. In order to do this, we need to run the Dapr sidecar. We can perform it by running the command dapr run --dapr-http-port 3300, as it will run dapr and set a sidecar at the port 3300. For your information, some firewall notifications may pop-up. Once the command is executed, we should see a console state like the one below. Please do not close that console window.

We will check if Dapr works using the state block, just to prove the point that all the elements are configured correctly. I hope you remember that Dapr is focused on HTTP requests, so to show that Dapr is working we need to make this kind of request. I’m going to use Postman for that, but feel free to use any tools of your choice.
First, we need to put something into the state block. To do this, we will send a POST to the http://localhost:3300/v1.0/state/statestore. It is going to have a JSON body of
[
{
"key": "karoltest",
"value": "It is alive :)"
}
]

It simply puts a passed value into a passed key. Piece of cake! Now that the value is stored at the Dapr level, we can read it from anywhere. So, we will do it from another Postman tab. Reading data from store is super easy, so we can do it by sending GET at the http://localhost:3300/v1.0/state/statestore/karoltest.
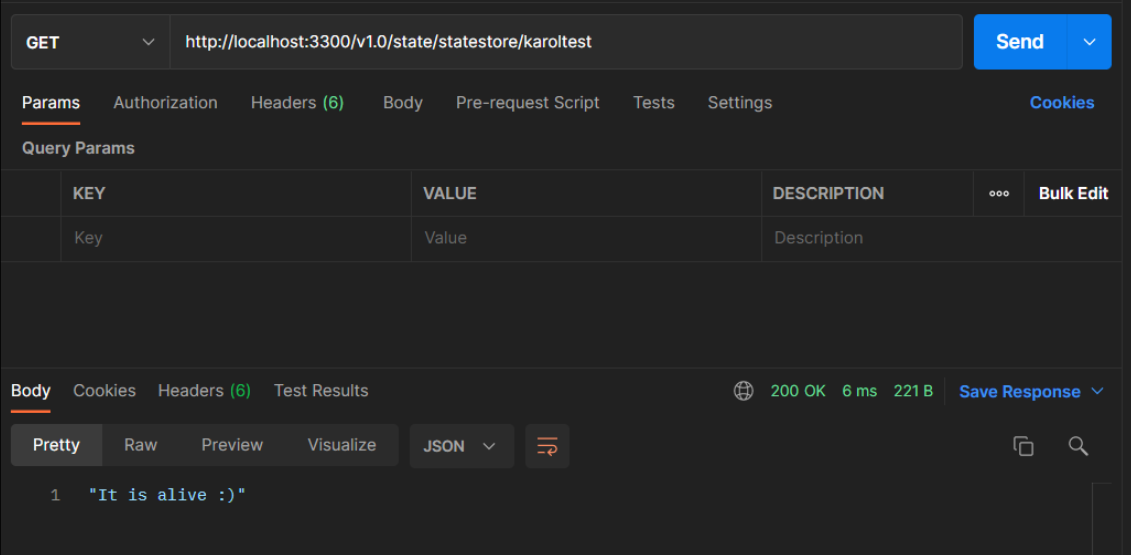
Great success. The state’s value for ‘karoltest’ key is ‘It is alive :)’. It worked! We are done here.
Summary
That was a lot of work we did today. Well done if you guys stuck it out. We understood how Dapr is working in the backstage, installed the Dapr CLI, started Dapr locally and finally used state block to store data.
Now that all the elements are in place, we will focus on the sample application and improving it with Dapr.
Till next time. Keep coding!