In my last article, I’ve introduced you, dear reader, to ML.NET. We’ve created a sample application using the Model Builder to classify Palmer Penguins based on their measurements. However, that’s merely the beginning of our journey.
Data Classification is just one of the scenarios available to users of this technology. This time, we will go a different route and discover how exactly Object Detection in ML.NET works.
What is Object Detection?
Imagine Image Classification: as an input, we use a picture of an animal. Scanning the picture, the machine learning model predicts what's depicted in it, or rather assigns your image with a label. It’s a cat, it’s a dog, you get the idea.
In contrast, Object Detection not only assigns class but also coordinates these labels. One image may contain many objects of different classes and also multiple elements of the same class.
On the image down below, you can see an example of properly working object detection of Google Cloud Computer Vision API:
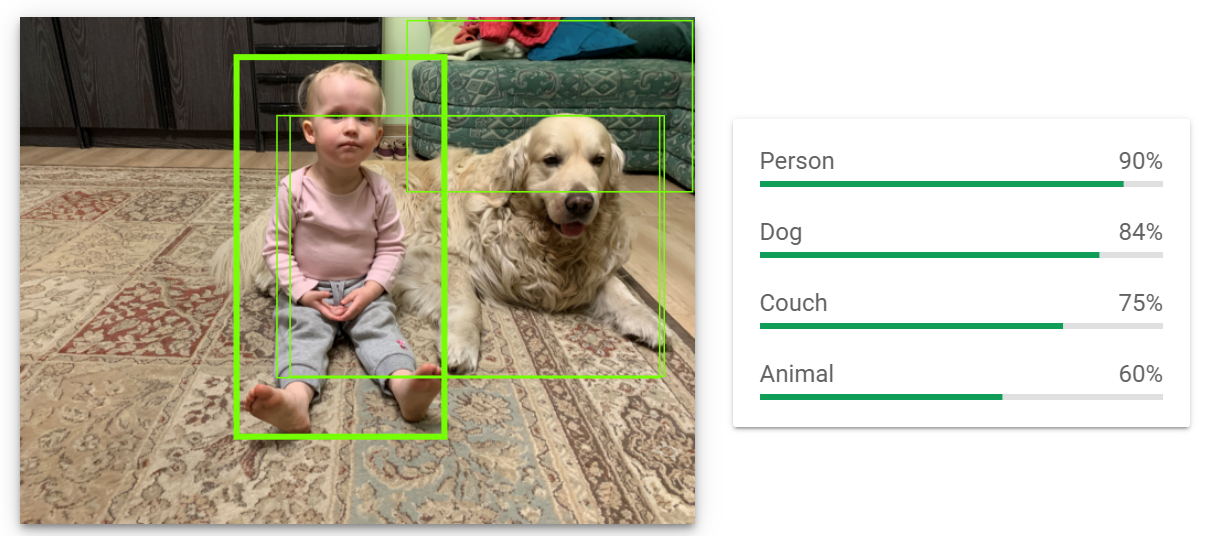
On the image, we can see rectangles (officially known as “bounding boxes”) with classes assigned to them. Our Machine Learning model correctly recognised the girl as a person, the dog sitting next to her got two labels, and even the couch was labelled.
Preperation
Let's start with a quick recap of our previous lesson:
- We can use ML.NET without internet access
- It can use models made in other technologies (for example YOLOv5 from PyTorch)
- It can be used to create its models.
Last time we trained a completely new machine learning model from scratch on our PCs, using a CPU. Object detection is a complicated issue and unfortunately, Microsoft lacks this option.
Instead, we are forced to use Azure to generate such a model. Then, we can download it to use it offline without access to external services.
For starters, we need a dataset; a list of images that contain an object we want to detect. Official Microsoft sample detects Stop Signs as an example of the Self-Driving Car algorithm. You can download it from here.
I always try to do things my way and instead I’ve gathered six pictures of a sign called “Signal Ahead”. You can download them, along with the code, from here.
Next, we need to tag objects on those images using a program called VoTT. VoTT stands for “Visual Object Tagging Tool”. It’s an electron app and it can be used in a browser or installed as a stand-alone application. You can download it here.
Done? Great, now launch the program. You should be greeted with a modest-looking welcome screen.

It’s time to create a New Project. Click on the first icon. We need to fill in the “Project Settings” sections. Fill in the “Display name” and “Description” sections. When it comes to source connection, we need to add a new one, so click the “Add Connection” button:
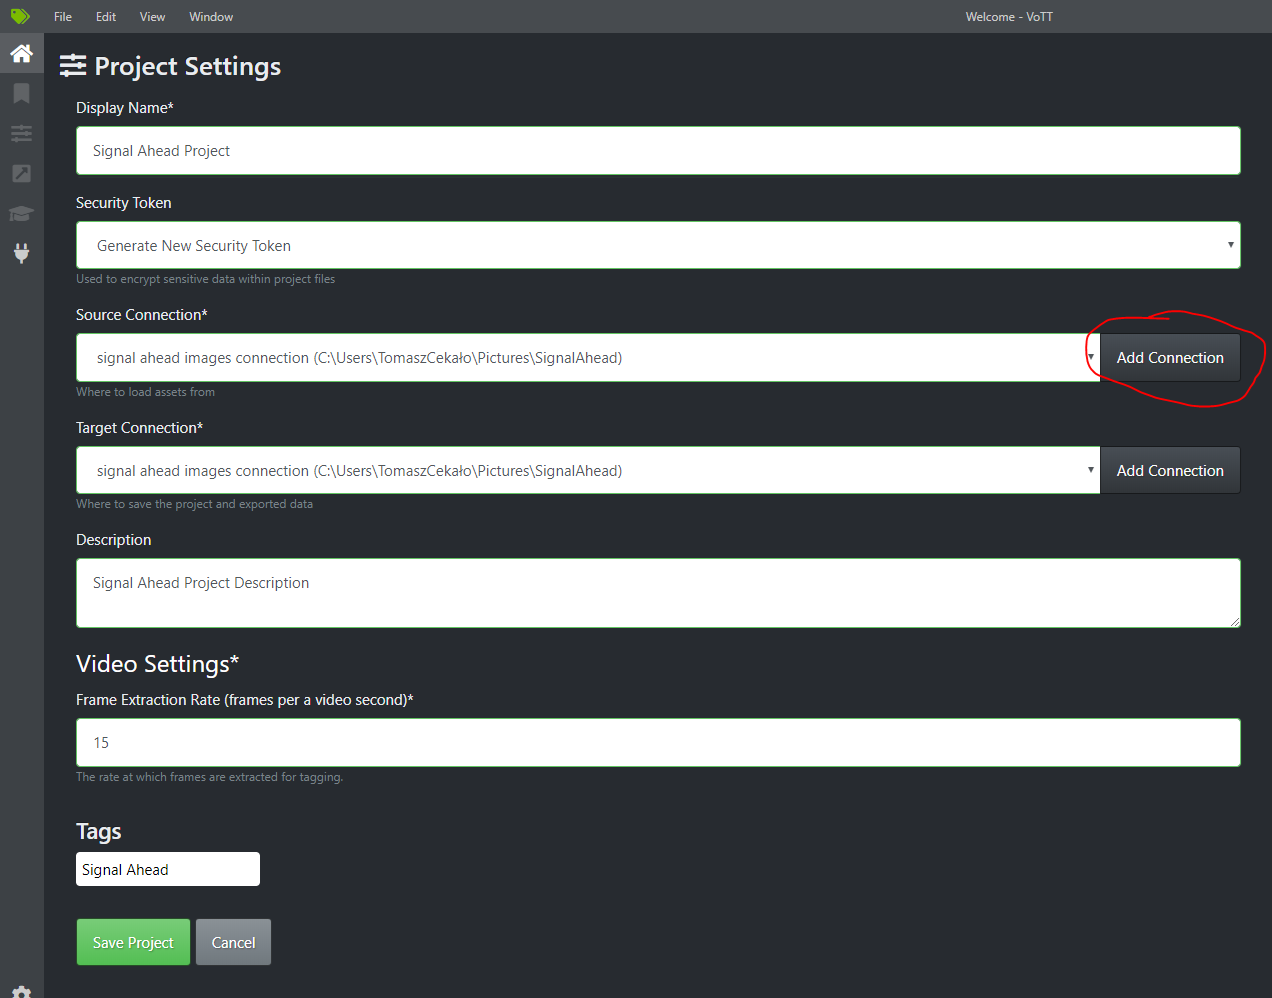
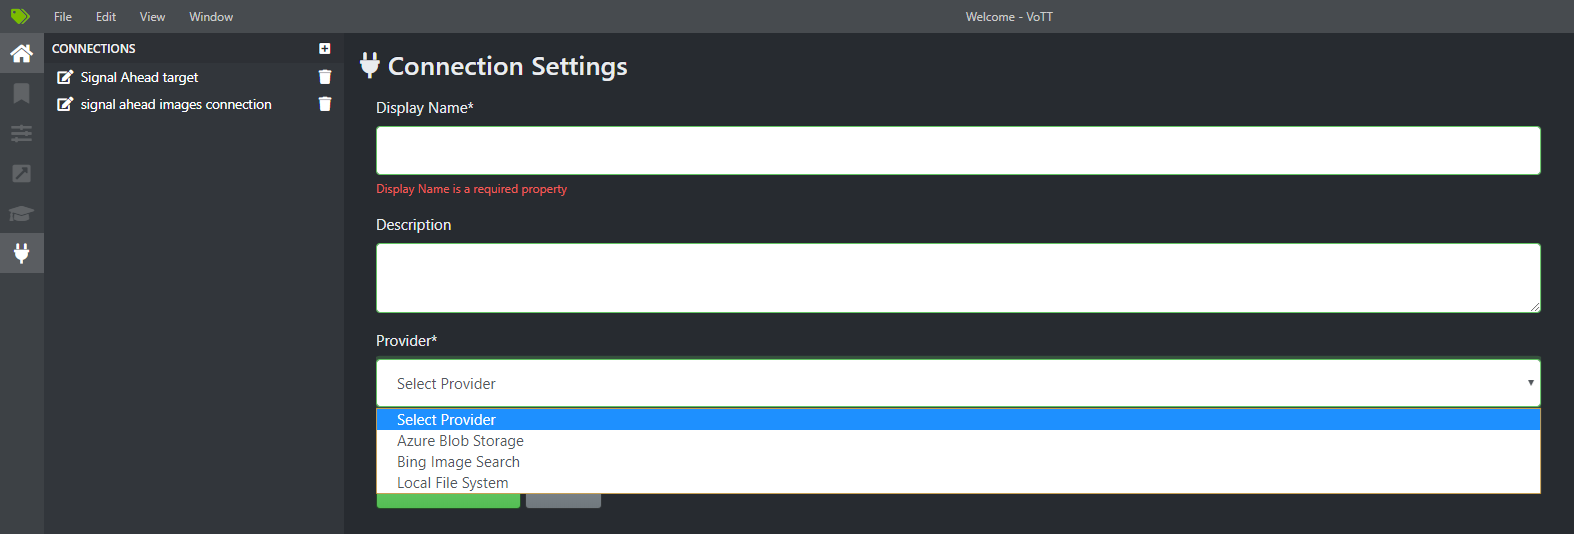
In the “Connection Settings” tab, fill the “Display Name” and, optionally, “Description”.
As for providers, we can choose either “Azure Blob Storage”, “Bing Image Search”, or “Local File” System. I train using a local file system. Click Save Connection.
Do the same for “Target Connection”. Make sure both connections are selected from the dropdown. Now save the project.
Tagging objects in VoTT
We are now in the main view of VoTT. On the left, we see a list of pictures that we're working with. In the middle, we can see the currently selected one. On the right, we have a list of tags. Click on the plus sign (A), give your tag a name and hit enter.
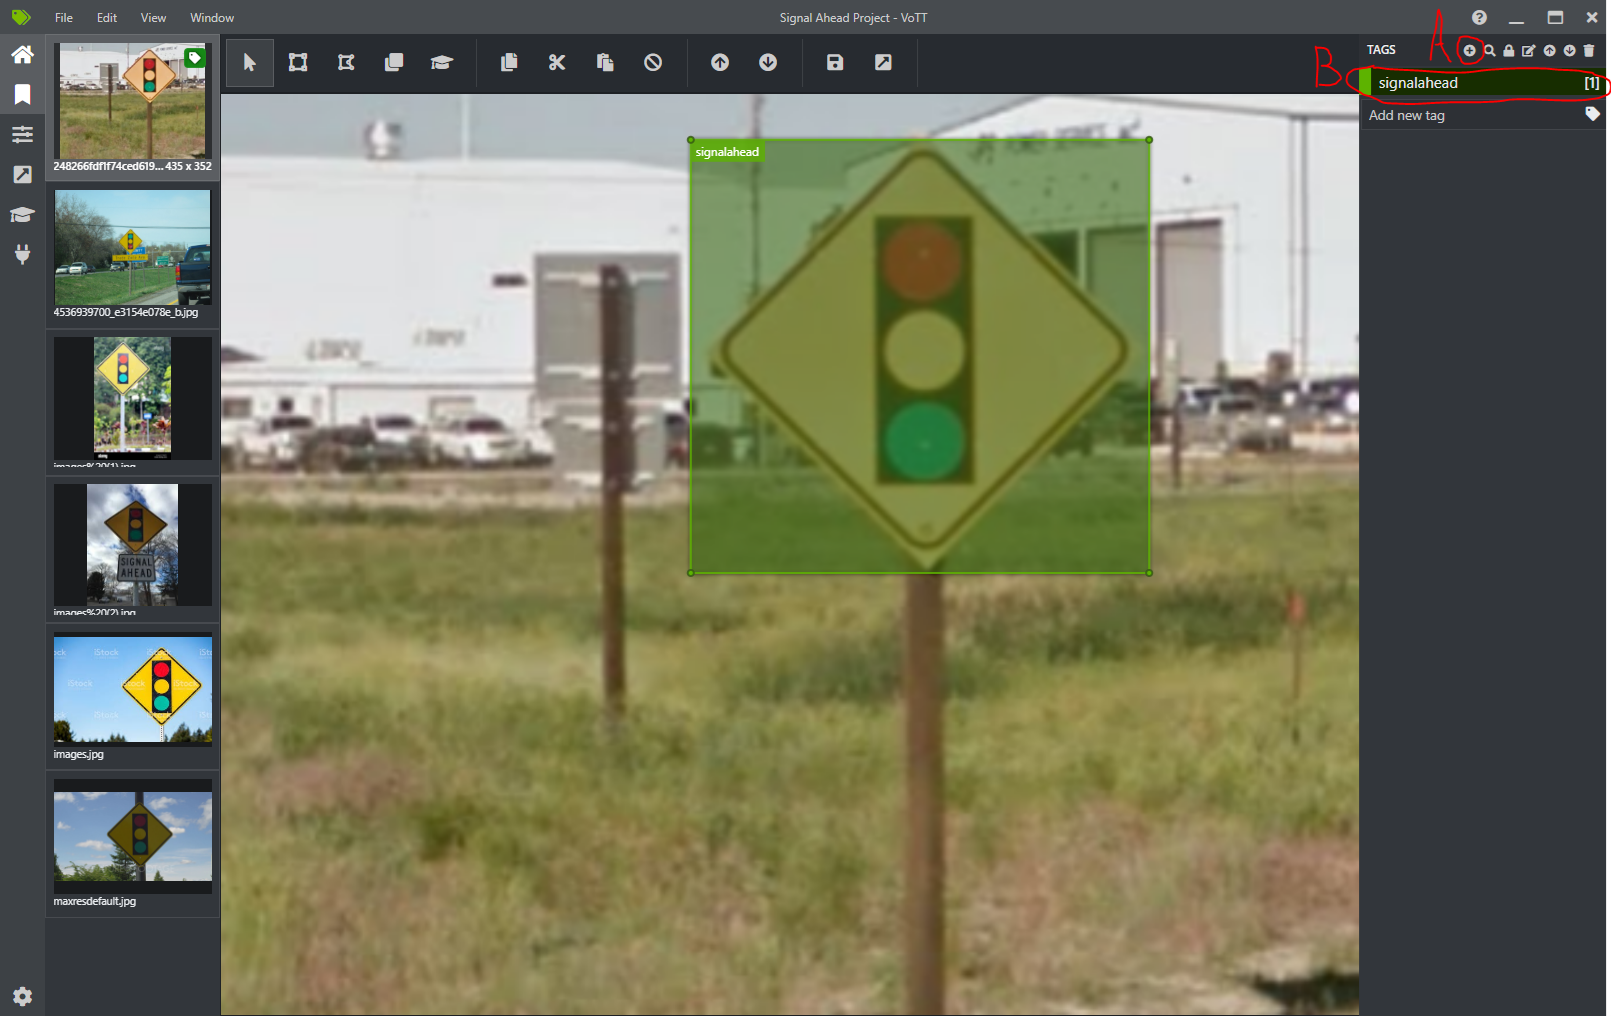
I am going to detect only one type of object, that’s why it will be the only tag for me.
Tagging objects in VoTT is really simple. First, select the part of the screen where you see an object. Make sure an entire thing is within selected bounds. The selection should be grey. If you made a mistake, you can either fix it by dragging the corners of your rectangle or delete it entirely by clicking on the small X. Next, click on your tag on the right panel. Your selection should get the same colour that was assigned to the tag, in my case both are green now. And that’s it! Now do the same for all images and Save your project.
To generate JSON used by ML.NET in the learning step click on the Export icon on the left (C). Click “Save Export Settings” with default Provider: VoTT JSON, because that’s what we need. In the output folder we should have a file called {YourProjectName}-export.json, which contains a list of tags, images (here called assets) and regions.
Now let's go to the Model Builder.
Training model
Like before, create a project in Visual Studio: click Add -> “Machine Learning Model” and choose a name. From the list of available scenarios pick “Object detection”. 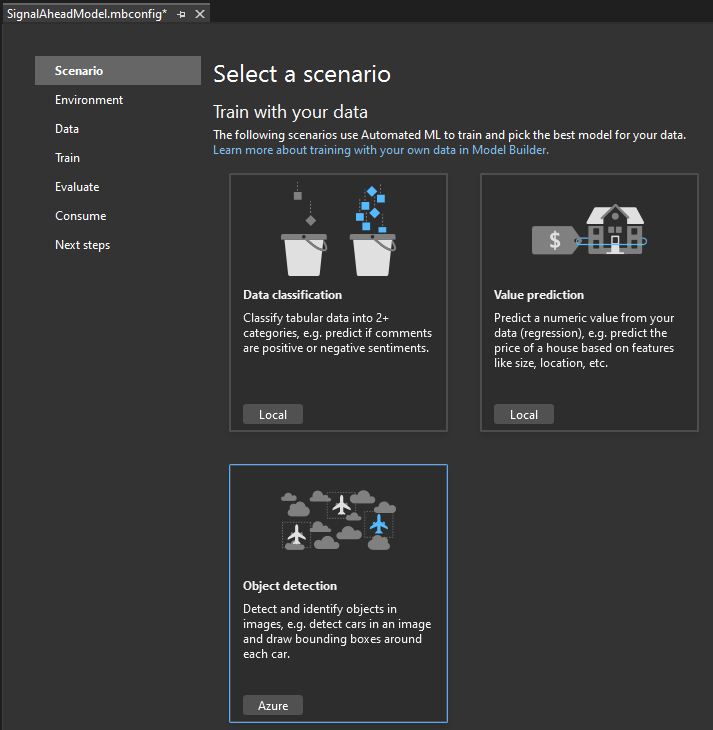
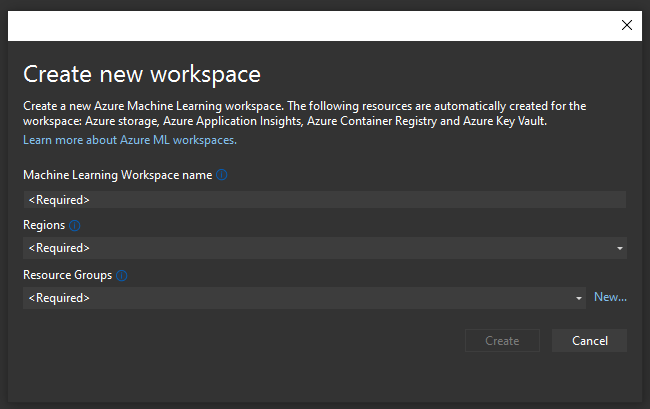
In the environment tab, we need to create an Azure ML Experiment. It can be done from Model Builder or Azure Portal. I’ll show you how to do it both ways. Click on “Set up workspace”. You should see a pop-up window with four fields to be filled:

Choose your subscription. Beforehand, make sure that your subscription allows you to create compute resources. It may be necessary to ask your admin if there are some limits on the types of resources you can create.
Choose or create new Machine Learning Workspace. If you create a new one, the only fields you need to provide are its name, region and resource group. Make sure that the region you choose is the one closest to you, this way the process of learning will be quickest:
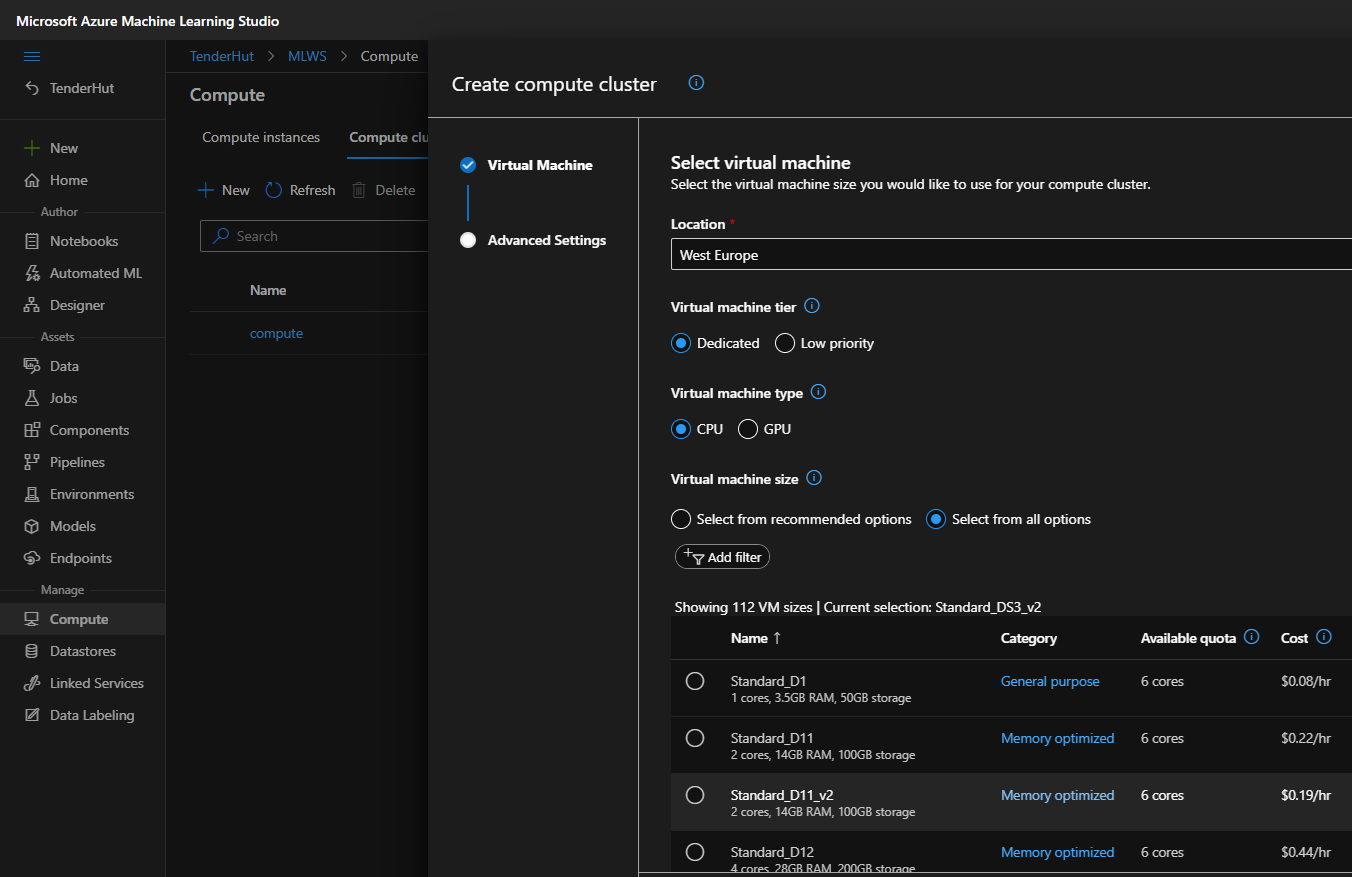
Next, we create compute. Here, we need to provide its name, size and priority:
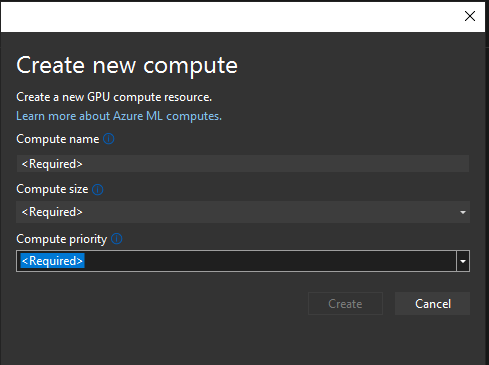
The only available size for me is the one called “Standard_NC6”. When it comes to priority, I’ve chosen a dedicated one. Click create and make sure it is checked in the dropdown. One more click, create, and it’s done!
Now, let's learn how to do it using Azure’s web interface.
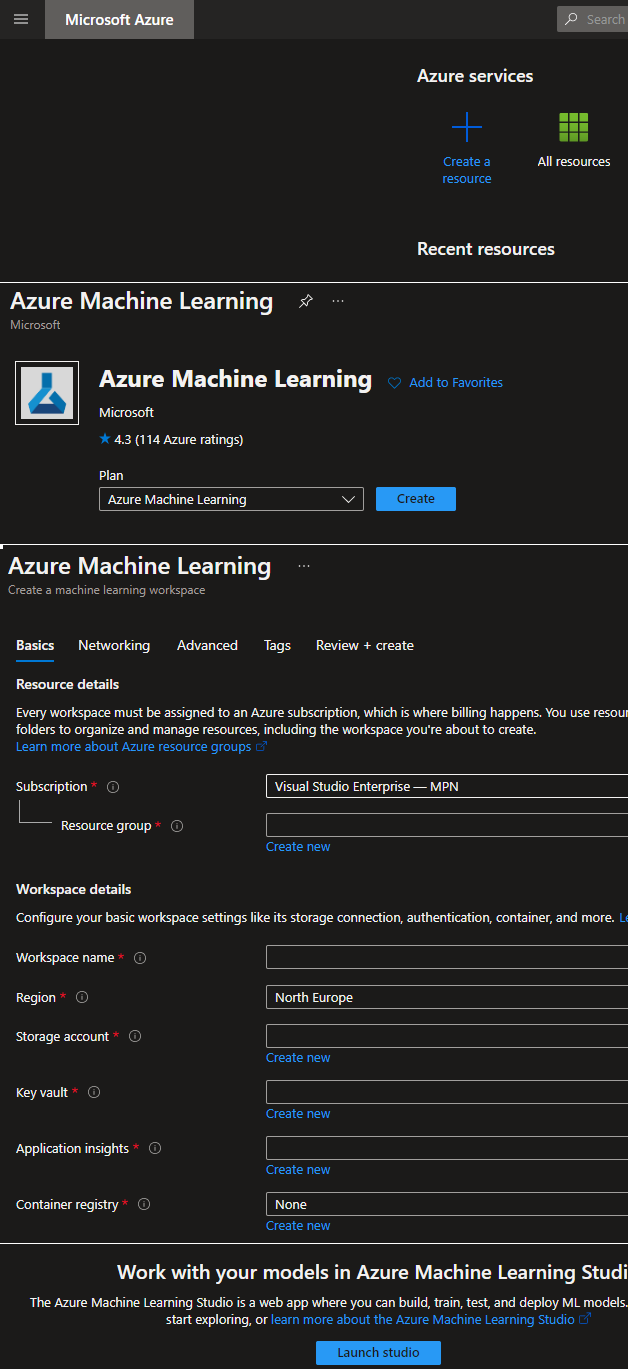
Go to Azure Portal, click “Create a resource” and type “Azure Machine Learning” in the search bar. Then, click “Create”. Fill the missing fields by choosing existing resources or creating new a one. After you are done, click “Review+Create” and, finally, “Create”. It may take some time. When it’s done, go to your resource and Launch studio.
You should get redirected to ml.azure.com. From there. go to “Compute” -> “Compute clusters” -> “New” and choose the appropriate VM. If you do not see a specific VM, then make sure to check “Select from all options” in the “Virtual machine size” section. Click next, provide a name for your compute and click create.
Data and training
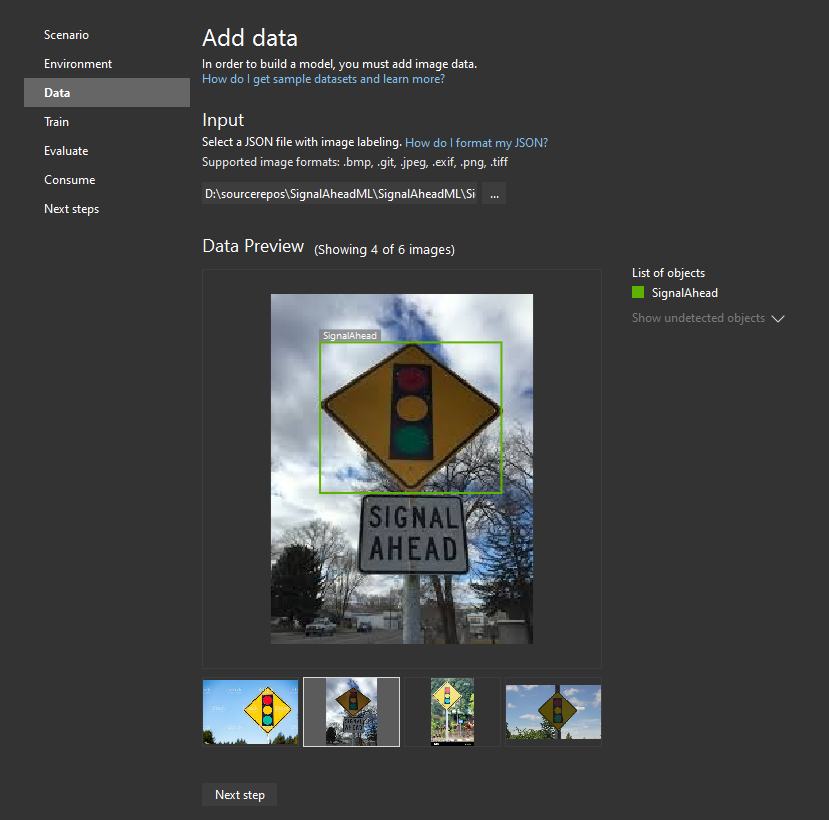
Now, let’s provide the model builder with some data. Go to the “Data” tab, then from the file picker choose "Target JSON file" (the one we exported from the VoTT project in the previous step) and make sure that the images have loaded correctly. In the preview window, you can check if rectangles are displayed on your photos. Under “List of objects”, we can see tags that we created for this detection project:
Proceed to the next step. Here, the only thing we need to do is click on the “Train” button. The process will take some time, depending on the number of images and their resolution. For my dataset, it takes up to 10 minutes. Once it’s done, you will be provided with training results, showing the accuracy and type of the generated model, as well as how much time it took to train.
Evaluating your model
Here we can check if the model is trained correctly. I highly recommend downloading some images that were not in the training dataset to use as a benchmark. Play around with different images and the “Score threshold” slider. The lower the value of it, the more objects it might detect, often incorrectly. If the value is high, then it might not detect what you want. Take a look at my example:
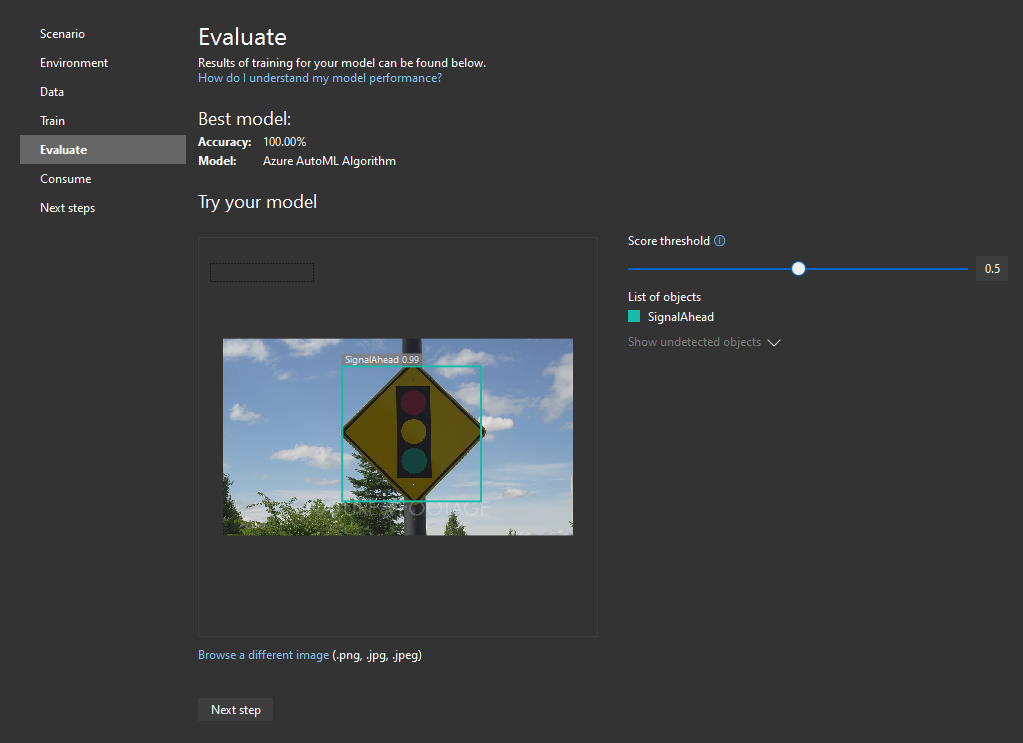
As you can see, you can see the accuracy of detection above the detected signal ahead sign. If I lower the threshold, I get multiple selections. If you are not happy with your results, re-evaluate your model, and feel free to train again. If the model is ok, proceed to the next step.
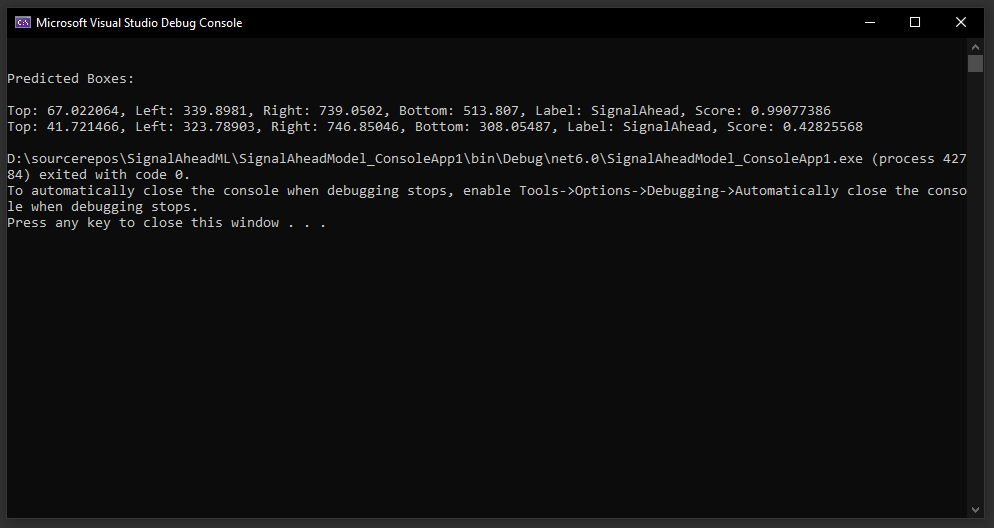
Consume object detection model
Here we can add ready-to-use projects to our solution:
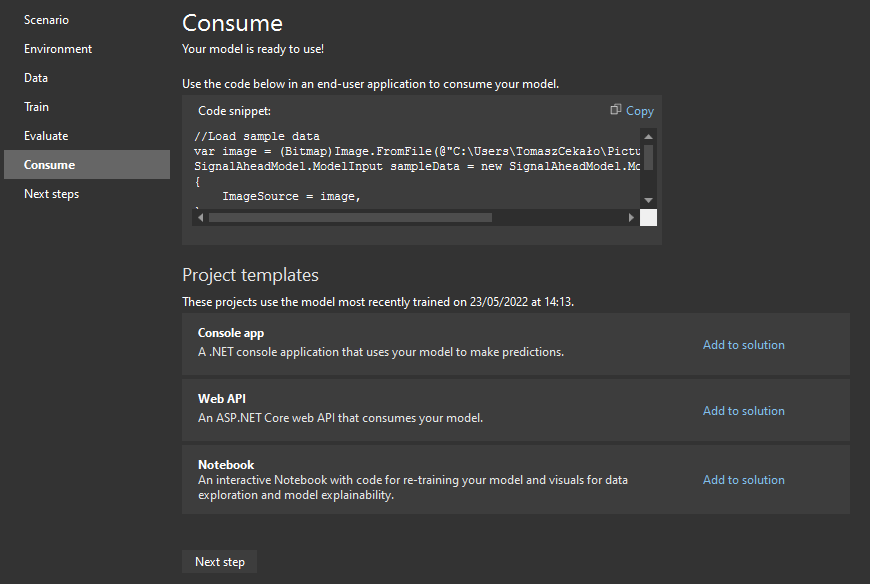
As you can see, I’ve created a simple console app. When I run it, I get two predicted boxes, with the second one being a false positive in my opinion, because it’s in a completely different place and my dataset contains only one sign per picture:
Summary
Scenarios available in ML.NET Model Builder can be trained in two different ways:
• Locally
• On Azure.
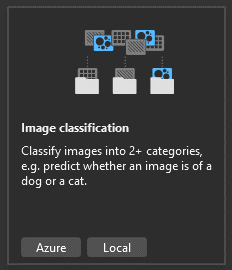
Most of the scenarios can and must be trained locally. However, Object Detection from this article can be trained only on Azure. When it comes to Image Classification (not covered yet), it can be trained however we want, with both methods available to us:
With the newfound knowledge from both articles, you will be able to cover all scenarios.